Rodent Control 101
Physical Characteristics
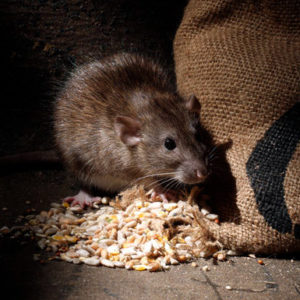
Norway Rat
Norway Rats:
- The largest of commensal rodents.
- Head and body are 7-10 inches long. Tail is shorter than the head and body @ 6-8 inches.
- Weighs 7-18 ounces.
- Body fur is course and ranges from reddish brown to grayish brown with buff underparts, but there are many other color variations including all black.
- Prefers to live in underground burrows. Indoors, they prefer to nest around the lower floors, but will move to attic when rat populations are high.
- Can jump over 2 feet high, do a running jump of over 4 feet long and can survive vertical drops of over 50 feet.
- Dropping are 3/4 to 1 inch long and capsule shaped. They may produce 30 to 50 droppings per day.
- Females may have 4-7 litters per year with 8-12 young per litter.
- Average rat lives 5-12 months in the wild.
- Prefers to eat cereal grains, meats, fish, livestock feed, fresh fruits and vegetables. May also eat small mammals, birds and insects.
- Norway rats require 1 ounce of food per day.
- Norway rats need ½ to 1 ounce of water per day.
- May be found in almost every type of structure, sewers, drains and dumps. Common to find them living near streams, lakes and ponds.
NOTE: In some cases, a young rat may be confused with a house mouse. Look closely and if the head and feet are disproportionately large for the body size, then you know it is a baby rat.
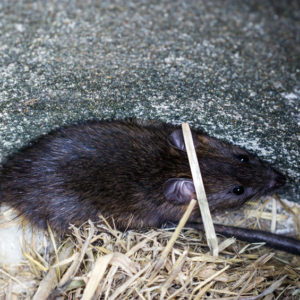
Roof Rat
Roof Rats:
- Smaller and sleeker than a Norway rat.
- Head and body are 6-8 inches long. Tail is longer than the head and body @ 7-10 inch.
- Weighs 5-9 ounces.
- Fur is usually grayish black to a solid black with the belly buff-white to all gray.
- Roof rats prefer to live above the ground.
- Roof rats are great climbers.
- Can jump over 2 feet high, do a running jump of over 4 feet long and can survive vertical drops of over 50 feet.
- Droppings are ½ inch long and spindle shaped. They may produce 30 to 50 droppings per day.
- Females may have 4-6 litters per year with 4-8 young per litter.
- Average rat lives 5-12 months in the wild.
- Prefer to eat seeds and plant foods such as fresh fruits and vegetables but will eat almost anything.
- Roof rats require ½ to 1 ounce of food per day.
- Roof rats need ½ to 1 ounce of water per day.
- Nest may be in trees, clinging vines, fences, inside attics, in ceiling or wall voids. May also be found in underground burrows, ground floor areas inside buildings and under piles of rubbish.
NOTE: In some cases, a young rat may be confused with a house mouse. Look closely and if the head and feet are disproportionately large for the body size, then you know it is a baby rat.
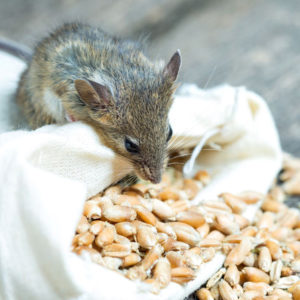
House Mouse
House Mouse:
- Resembles a small roof rat.
- Head and body are 2-3½ inches long. Tail is about same length as the head and body @ 3-4 inch.
- Weighs 0.4 to 1 ounce.
- Fur is usually a dark gray with a light gray on the belly but many color variations are possible.
- May be confused with deer mice, harvest mice and pocket mice which invade buildings located near fields.
- Because of its small size, adaptability and the fact that it needs small amounts of food and space, the mouse is capable of surviving in nearly any environment. They may never leave the house!
- Can jump over 1 foot high, do a running jump of over 2 feet long and can survive vertical drops of over 8 feet.
- Droppings are about 1/8 to 1/4 inch long, with at least one end or both pointed. They may produce 30-100 droppings per day.
- Females may have 8 litters per year with 4-7 young per litter.
- Average mouse lives 12 months or less in the wild.
- Mice are nibblers, may make 20-30 short visits to various food sites. Need about 1/10th of an ounce of food per day. Will eat almost anything but prefer cereal grains and various seeds. Meats, peanut butter and various liquids are readily taken.
- Mice even eat each other when food is scarce. May capture and eat roaches.
- Mice need very little water, but will drink 3-9 milliliters per day if water is freely available.
- In structures, mice set up nests near food sources. Outdoors, mice construct nests among debris or in underground burrows.
NOTE: In some cases, a house mouse may be confused with a young rat. Look closely and if the head and feet are disproportionately large for the body size, then you know it is a baby rat.
Integrated Pest Management In Rodent Control
These are the four important steps for IPM in rodent control. By implementing all four of these steps, you’ll find that your control programs will be far more effective and you’ll reduce or eliminate call-backs.
- Rodent Inspections
- Sanitation
- Rodent Proofing (exclusion)
- Population Reduction (rodent killing)
- Trapping Programs
- Rodenticide Programs
Rodent Inspections
Good rodent control begins with a thorough inspection and this should always be done before any control program is started. Here are ten rodent signs a good inspector should see, smell or listen for during a rodent inspection:
- droppings (feces)
- tracks
- gnawing damage
- burrows
- runways
- grease marks
- urine stains
- live or dead rodents
- rodent sounds
- rodent odors
Droppings are the most commonly encountered signs of a rodent infestation. When doing an inspection, look for:
- Look at the size of the droppings. This will help you to identify which pest you are dealing with. Don’t be fooled by droppings from American roaches, bats or squirrels.
- Look at the number of droppings you find. Once you know which pest you’re dealing with, you can find out how many droppings the pests will leave behind each day. This will help you judge the size of the rodent population.
- Take a closer look at various droppings. If they are shiny black and soft, you know they are fresh. After a few hours, droppings will become hard and brittle. Older droppings will usually start to fade to a grayish color and may easily crumble into dust when stepped on.
Rodent Tracks can be easily seen when there is dust or moist/wet soil. Look for rodent foot prints. Also, look for “tail drag” marks.
Gnawing Damage will often be seen on various items or parts of a building. Rats will commonly gnaw on items such as door jambs, ceiling joist, floor joist and wall studs. Look for holes where rodents have gnawed through boxes, packages, walls, cabinets, etc. Mice will gnaw clean cut holes, about 1 ½ in diameter. Rats holes will be about 2 inches in diameter, but you’ll probably see rough, torn edges.
Burrows of rats may be found next to walls, along foundations, under debris and around shrubs. If the burrows are clear of vegetation and the soil is compacted and smooth, it may be active. You can check the burrow by placing a wad of paper in the hole or filling it in with loose dirt. If you come back a day later and you see the hole is open again, you’ll know you’ve got an active burrow.
Runways are usually evident in high traffic areas. Look for runways where rodents have literally swept all the dust and dirt off while traveling back and forth. If everything around that area is dusty and you see a clean path, you’ll know you’ve got activity. On the outside, look for runways that are smooth, well packed and free of vegetation.
Grease Marks (skid marks) are from the oil and dirt of rats and mice. You’ll often see these along walls, located near runways. Look along the bottom of joists where rodents have been traveling, along beams or sill plates, along pipes and wires, on stairways and around openings in walls, floors or ceilings.
Urine Stains can often be seen on their runways and in areas where they frequent. An ultra-violet light can be a good tool to help you find these. Urine stains will fluoresce blue-white. Black lights are also useful to detect evidence of rodent urine on packaged goods in warehouses.
Live or dead rodents are a sure sign of a rodent problem. To find live rodents, you should do your inspection when the rodents are most active (at dusk or just after dark).
Sounds made by rodents can be another good indicator. Sometimes you’ll hear high-pitched squeaks from their young. Or, maybe you’ll hear them scratching, digging, gnawing, running or fighting with one another. Turn off all radios, televisions and tell everyone to keep quiet. Listen carefully and you may find exactly where the rodents are hanging out.
Rodent Odors are another good indication of a problem. If you open a door, climb into an attic and you smell that characteristic odor from urine and droppings, you know that rodents have been there. Other times, you’ll smell the strong stench from a dead rodent. NOTE: When trying to locate a dead rodent, always be on the lookout for flies – they may lead you to the source!
Be careful when trying to estimate the size of a rodent problem or population because it is a hard thing to do. If you find an abundance of fresh droppings, you can probably assume there is a large population. If you just see a few droppings, there may only be a couple of rodents and you can guess they have only been there for a short while. It is always better to over estimate the problem than to find out later that you didn’t place enough traps. Callbacks can be time consuming, cost you money and lead to an unhappy customer.
Sanitation
Anytime you see a large rodent problem in a home or building, you know there must be an abundance of food and shelter available. Otherwise, the rodent population would not be living there and thriving. By removing their food sources and removing as much shelter as possible, you can make a serious reduction in their population. Here are some sanitation ideas you can use to really make a difference:
- On the outside, you’ve got to clean up rubbish piles and debris. Whenever you have trees that produce fruit or seeds, always clean up the fruit and seeds that have fallen onto the ground. Trash cans and dumpsters must have tight fitting covers. Firewood, equipment and items stored outside should be kept 18 inches off the ground.
- Landscaping around the structure must be maintained. Weeds and overgrown vegetation can provide rodents with good food and shelter. Shrubs should be cropped up, 12 inches or more, from the bottom so that rodents have no place to hide. Trees should be cut back at least 4 feet away from the structure. Vines on sides of structure must be kept trimmed down at least several feet below the roof line.
- Pet and bird food can be a real magnet for rodent problems. All of this needs to be cleaned up. Homeowners should be instructed to give pets and birds food only what they need to eat and then immediately remove any left over food and spillage. Pet and bird food must be stored in rodent proof containers.
- Indoors, rodent harborage should be identified and eliminated or modified. Always remove excess clutter. In warehouses, stored items should be kept 8-10 inches off the floor and 18-24 inches away from the wall.
Rodent Proofing (Exclusion)
The best way to control mice and rats is to try and make it impossible for them to find anyway to get into the structure. When doing your inspection, every possible entry point must be considered and addressed.
When excluding mice; Any opening 1/4th inch or greater should be sealed.
When excluding rats; Any opening 1/2 inch or greater should be sealed.
Here are some common rodent entry points that need to be addressed:
- Check for entry points under and around doors. If the gap under the door is greater than 1/4th inch, install a door sweep and/or a threshold to close up the gap. Check doors and jambs to make sure they are in good repair. Sometimes, sheet metal may have to be installed on door jambs to keep rodents from gnawing their way through. Some garage doors may need new weather stripping installed along the bottom and sides.
- Pay close attention to air conditioner lines leading into the structure. Many of these have large holes or openings around them that allow easy access for rodents.
- Check utility lines or pipes leading into the house. Some of these may have holes or openings around them that need to be sealed.
- Check all lines from utility poles that lead to the structure and you may find that rodents are simply walking down these lines and gaining easy access to the structure. Sometimes, you may have trees and/or vines growing around utility poles or touching the lines. If that is the case, cutting and trimming back these trees or vines may be needed. Other times, you may need to install rodent guards (some guards look like funnels or discs) on the lines to block access.
- You can keep rodents from climbing up pipes and wires by installing metal guards around them.
- Check vent screens and repair or replace as needed. Use 1/4 inch wire mesh.
- On structures with raised foundations, check all vent screens and access openings. Repair or replace as needed. Check for and repair any cracks or holes that may provide access to the substructure. NOTE: Some subareas or crawlspaces can be incredibly difficult to rodent proof because there are so many possible entry points underneath the structure. Your best bet is to keep rodents out of these areas by repairing cracks, holes and screening off all vents and access openings.
- Check attic and roof vents. Repair, replace and/or install new screens as needed. Use 1/4 inch wire mesh.
- When on the roof, check for openings around dormers and roof gables. Install wood blocking, wire mesh or sheet metal if needed.
- Chimneys may be an entry point for rodents. Check flashing around the chimney and repair or replace if needed. You may also find rodents are climbing up and getting into the structure through the top of the chimney. If that is the case, you may want to install a well screened spark arrester on the chimney. A metal guard can be installed around the chimney, also.
- Inspect the structure and make sure it is in good repair. Check for cracks, holes, missing windows, etc.
- Inspect pet doors. Some of these allow easy access for rodents, as well as for their pets.
IMPORTANT NOTES FOR RODENT EXCLUSION:
- When doing exclusion work, we strongly recommend using 1/4 inch wire mesh, sheet metal and mortar. Steel wool and expanding foam can be easily destroyed by rodents and are not a permanent solution. Also, steel wool will rust easily and could make a big mess on your client’s structure. Instead of steel wool, we recommend using “Stuf-Fit” (made of rust resistant copper) or, “Xcluder Fill Fabric” (contains stainless steel).
- Some roofs, such as wood shake or tile, cannot be rodent proofed because a rodent can simply climb under or in between any one of these wood shakes or tiles and gain easy access. Also, don’t forget to inspect roofs for holes or missing shingles. Your best bet is to keep all rodents off of any type of roof.
- All trees, plants and vines must be cut back at least 4 foot away from the roof. And, don’t leave branches hanging over the roof because rodents may be able to leap off of a branch and land onto the roof.
- Check with the owners and find out if doors or windows are being left open, especially after dark. If so, you’ll have to make sure they start closing these doors and windows or they will need to install heavy duty screens. Even the best exclusion work won’t help if a door or window is left open and rodents are simply allowed to walk right in!
- When performing exclusion work, don’t forget it is possible that some rodents may be brought into the structure in various merchandising. Talk to the owners and discuss ways to help prevent this from happening.
Population Reduction With Trapping
Trapping can be a very effective method of controlling rodents. Here are just a few of the advantages:
- No potentially hazardous baits.
- Quick results!
- Allows for immediate disposal of dead rodents and helps to eliminate potential odor problems that could occur if a rodent were to die in an inaccessible area.
There are four types of rodent traps that are commonly available:
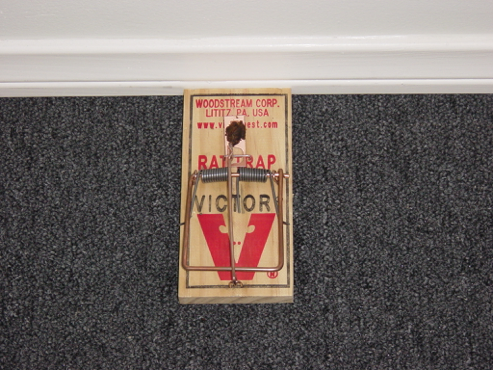
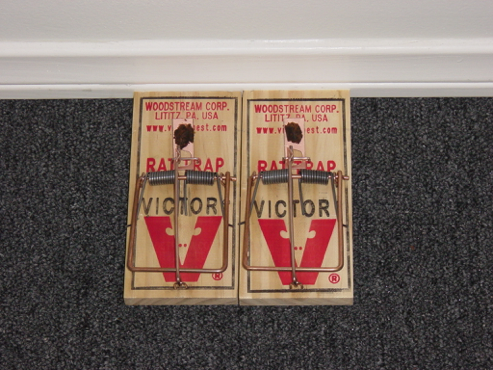
- Common snap trap.
- Live rodent trap.
- Multiple-catch traps
- Glue board traps
Important Notes About Using Snap Traps:
- When placing traps, make sure that they are kept away from children, pets and non-target animals!
- It is important to place rodent traps in the proper locations. Rodents have very poor eye sight and they follow walls and/or surfaces with their vibrissae (whiskers). In other words, if your trap isn’t placed right in the middle of their path, they may walk right by it!
- Traps should be placed in areas where you see activity. Place traps in dark corners, behind appliances or other objects, along walls and near entry holes. Always look for runways and place traps right in the middle of their path so rodents will be forced to walk over them.
- When traps are placed along a wall, the trigger should almost be touching the wall. If you need to place traps parallel to the wall, always place two of them back to back so that no matter which direction the rodents come from, they will hit a trigger first.
- Pipes, wires, heating and air conditioning ducts, beams and rafters are frequently used by rodents as runways. It is a good idea to fasten rodent traps over these items. Make sure the trap is fastened securely so it doesn’t rock when a rodent steps on it. And, make sure the trigger is right in the middle of their path. If you need to install traps parallel to their runway, use two traps and place them back to back.
- Use plenty of traps. Mice don’t travel far, so place these about 10 feet apart. For heavy mice infestations, you may want to space them at 6 feet. With rats, space traps between 15 and 20 feet.
- When trapping, Trapper Jack’s Macadamia Rodent Lure works especially well. Place a small portion on the trigger. Squeeze the product gently to affix the product to the trigger so that the rodents won’t be able to lick or pull it off without setting off the trap.
- In some situations, you may want to use nesting materials (cotton, insulation, styrofoam and other soft materials) as a bait.
- Mice are curious and that makes them much easier to trap than rats. Don’t be surprised if you set out mouse traps and catch one almost immediately (That is a good thing and your customers will be impressed!).
- Old and used rat traps are best! New traps can scare off rats. Anytime you see an old trap, grab it and start your own collection. Traps that have been used to catch a rat are really good, especially if they are bloody because they have a very familiar “rat smell”.
- When trapping outside, always place your traps in tamper resistant plastic stations. We only want to catch rodents and we don’t want for a not target animal (bird, cat, dog, etc.) or child to get nailed by one of your traps!
- In most cases, trapping service should be performed once a week for four consecutive weeks. If you’ve done your job right, all rodents will be gone and you can remove all of your traps on the fourth and final visit. NOTE: Not all rodent problems can be eliminated in four weeks. In some cases, service will have to be extended. Heavy rodent populations may take much more time to control.
- Pre-baiting traps is a very clever strategy for trapping rats because rats are shy about new items in their areas. Place your traps, leave them unset and maybe put on a little bit more Trapper Jack’s than you normally would. The idea is to lure the rats and get them used to eating off your traps. After a few days, come back, put on some fresh Trapper Jack’s and then, set the triggers. In many cases, the rats will come back for more food, only to be hit by a “big surprise”.
- Keep pesticides, human odor and other fear stimulating odors away from traps, baits and lures! We also recommend that you wear gloves when handling these items to help increase your success rate.
Rodent Trap Placement
-
- Proper Placement Of Trap With Trigger Next To Wall
-

- Wrong! – Trap Too Far Away From Wall
-

- Wrong! – Trigger Not Next To Wall
-
- A Double Set Increases Your Chances
-

- Double Set Placed Parallel To Wall With Triggers To The Outside
-

- Wrong! – Parallel Set With Triggers On The Inside
-

- Trap installed on pipe and held in place with heavy-duty rubber bands
-

- Use nails or screws to attach traps on joists, rafters, studs, etc. Always make sure that the trigger is centered in the rodent’s pathway.
Live Rodent Traps:
- From time to time, you’ll need to use live trap rodents. Maybe it is because you have a customer who does not want for you to kill these pests. Or, maybe they can’t handle the sound of a trap snapping a rodent. If they ask for live trapping, don’t argue with them. Live traps will work fine. Use Trapper Jack’s Macadamia Nut Rodent Lure and install these traps in a fashion similar to the way you would use snap traps. NOTE: Live trapping is much more labor intensive and will require more frequent service visits. Also, you’ll need to remove trapped rodents before they die in the cage. Depending on the situation, you may have to service these accounts on a daily, or at least an every-other day basis. When estimating costs for these services, always consider the extra time and extra costs for live traps that will be required.
Multiple-Catch Traps:
- Multiple-catch traps are specifically made for catching mice. These are especially good to use in commercial accounts and in areas where you have a large mouse population.
- These device boxes have a one-way trap door that allows mice to walk in, but they can’t get out. Many of these traps will hold 15 or more mice (that will save you from having to set out 15 individual traps!).
- Multiple-catch traps are a good way to provide rodent control without the risk of having a child or pet being snapped by a trap.
- Multiple-catch traps do not always need to be baited. However, the use of Trapper Jack’s Macadamia Rodent Lure may increase performance when alternative food sources are limited.
- Place these traps in a fashion similar to the way you would use snap traps.
- These traps need to be kept clean and should be serviced regularly. If neglected and left full of live mice, they may create a lot of noise. Also, if mice are left in these traps for extended period of time, they will die and cause an odor problem.
Glue Board Traps:
- Glue boards catch and hold rodents in a way that is similar to the way flypaper catches flies.
- Glue boards are a good way to provide rodent control without the risk of having a child or pet being snapped by a trap.
- Glue boards work better for mice than rats. Rats will often escape or simply pick up the entire glue board trap and carry it away (If you want to use glue boards to catch rats, make sure they are secured). Glue boards do not work well in attics or areas of high heat (they melt!)
- Glue boards do not work well in areas where there is a lot of dust or dirt – this will cause them to lose their stickiness quickly.
- Put a small portion of Trapper Jack’s Macadamia Nut Rodent Lure near the center of each glue board. Gently press the product onto the glue board so that the rodents can’t lick or pull it off.
- Place glue boards in a manner similar to the way you would place snap traps.
- Some glue board traps are simply cardboard with a sticky substance applied to one side. These cardboard traps are flexible and can be folded or bent into a number of different shapes. This feature will allow for you to get creative and find special locations to place them. For example, let’s say you have a pipe where rodents are frequently walking through the inside of the pipe. If that is the case, take the glue board, roll it up with the sticky side facing inside, and place it in the pipe. Next time a rodent walks through that pipe, it will find itself stuck inside. What if you have rodents walking over a pipe? In that case, wrap the glue board around the pipe with the sticky side out. Be creative and you’ll find a number of ways to use these effectively.
Population Control With Rodenticides
Rodenticides are poisons which are used to kill rodents. When using these products, it is extremely important that you understand and follow all label instructions. Safety must always be your first concern. There are several different kinds of rodenticides and they can be divided into two broad categories: anticoagulants and non-anticoagulants.
Anticoagulants:
Anticoagulants disrupt the normal blood clotting mechanisms in rodents and cause them to die of internal bleeding. Here are some important facts about anticoagulants:
- These products cause rodents to die over a couple of days and without pain. This is important because they won’t associate their death with their food supply. This also allows for them to return to the bait over and over again without developing bait shyness.
- Anticoagulants are relatively low in hazard to humans and pets.
- In case of accidental poisonings, the delayed action of these products will provide more time for medical professionals to prevent serious consequences. Vitamin K-1 and blood transfusions are the best antidotes.
- Anticoagulants are available in a number of formulations, such as food baits (grain pellets, grain meals, seeds, weather-resistant paraffin blocks), liquid baits and tracking powders.
- First generation anticoagulants are CHRONIC poisons designed to kill after multiple feedings. Some of the active ingredients are warfarin, chlorophacinone, diphacinone, coumafuryl and pindone.
- Second generation anticoagulants are ACUTE poisons designed to kill after a single feeding. Some of the active ingredients are brodifacoum and bromadiolone.
Non-anticoagulants:
- The manner in which non-anticoagulants cause death varies from one ingredient to another.
- Strychnine (1/4th to 3 hours) and zinc phosphide (1/2 to 20 hours) are single dose (acute) poisons that work fast.
- Bromethalin (2-4 days) and cholecalciferol (3-4 days) are single dose (acute) poisons, but death is delayed up to several days.
- Sodium fluoracetate (compound 1080) and fluoroacetamide (compound 1081) are registered only for rat control in sewers. They are rarely used. These are highly toxic to most mammals and kill rapidly. There are no known antidotes for these products and they must never be used around residences.
Important Rodent Baiting Notes:
- Do not start a baiting program unless you are sure that the structure you are protecting is properly rodent proofed. You cannot afford to have rodents eat these poisonous baits, go off and die inside the structure!
- If you even suspect that there may be any live rodents inside of the structure, these should all be trapped and removed before starting a poisonous baiting program. Use Trapper Jack’s to quickly lure rodents into your traps. Once you’re sure that they’ve all been caught, then you can start your exterior baiting program.
- Poisonous baits must be placed in tamper resistant bait stations. The only exception would be when baits are placed in underground burrows. Extra care must be taken when treating burrows to ensure that children and non target animals will not be affected.
- Bait stations must be properly secured (attached, staked, chained or glued down) and labeled.
- Bait stations must be installed no further than 100 feet from the structure.
- Place bait stations in such a way that they will stay dry. It is also important to place bait stations “discreetly” out of site so they won’t be an eyesore or be attractive to young children.
- Poisonous baits should not be used inside of any structure. We can’t risk having rodents die in inaccessible areas and creating odor problems. The only exception might be an infested building that is going to be torn down after treatment.
- Bait stations must be maintained on a regular basis. You need to make sure that baits are fresh and that the bait stations are kept clean. Stations must be properly labeled and secure.
- Some bait stations have more traffic than others and you’ll have to adjust accordingly. If all of the bait in a station is being consumed between services, use more bait. If bait is still left in a station when you do your next service, use less bait or move it to a new location.